This paper describes use of PowerPoint presentations as a lecture aid in the higher education writing classroom. It summarizes types of presentations that are useful and student assessment of these presentations. It also provides some advice on required equipment, issues to be aware of, and tips for effectively using electronic presentations.
Introduction
Computer-generated slide presentations can enhance the effectiveness of classroom lectures. As an instructor, I can emphasize main points and key announcements, and I can enhance my presentation with graphics. My presentations become more organized and flexible, and are easily updated or rearranged. From a student's perspective, class material is far more legible and interesting than hastily-scribbled notes on an overhead or chalkboard.
I can create a slide presentation quickly and easily with Microsoft PowerPoint. My output options include 35mm slides, overhead transparencies, presentations that students view themselves, or, using a scan converter, videotaped lectures. However, I usually display the presentation in class from a laptop computer. Using a real-time approach allows me to make last-minute changes and add flair to my presentations with slide and bullet transitions and simple animation effects.
Background on Hardware and Software
I use PowerPoint presentations in all my writing courses: desktop publishing, online documentation, technical graphics, writing for the Web, and introductory and advanced technical writing. I teach these classes in a computer lab with a ceiling-mounted CRT projection system. Classes are part lecture and part hands-on lab work. I use a notebook computer for my presentations. Using a real-time presentation rather than overheads allows me to quickly switch to actual software applications and demonstrate their use. In addition, my files are generally too large to fit on a floppy disk. So I prepare lectures at home and transfer the files via network connection to my laptop.
Uses for Slide Presentations
I use PowerPoint presentations to accomplish the following purposes:
- Support lectures by highlighting key points
- Present tips and outlines
- Present examples
- Provide pictures and other graphics supporting the material
- Stimulate interest by use of clipart and cartoons
- Display assignment information
- Make important announcements
Support lectures by highlighting key points. Bulleted points can help emphasize main points while students fill in additional detail. It is important to note that I provide students with workbooks containing lecture outlines. This book allows them to focus on the examples and fill in details as they wish. Otherwise, students complain that it is too difficult to take notes. They also look down at their papers rather than at the slides.
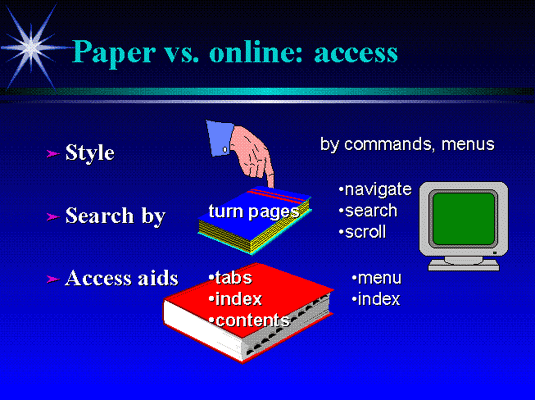
Presentation tips and outlines. Even though students in these classes are at computers and will be doing hands-on work, PowerPoint slides still are useful. For example, I can use slides to present the correct outline for a document. I can also provide examples of good and bad writing style or layout.
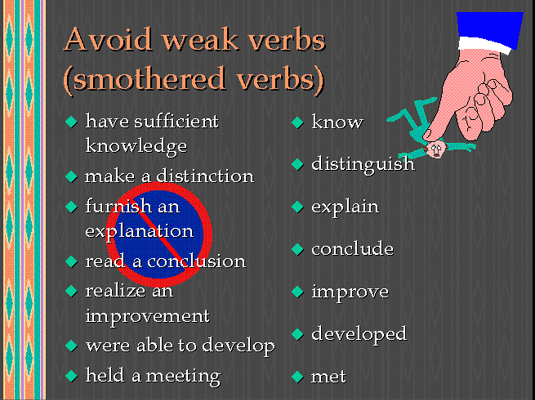
Present examples. I can provide examples from professional or student documentation. Options for getting these into PowerPoint include typing fairly short excerpts, scanning portions of the original, or using a screen capture program. For good legibility, however, it is important to keep the excerpts short.
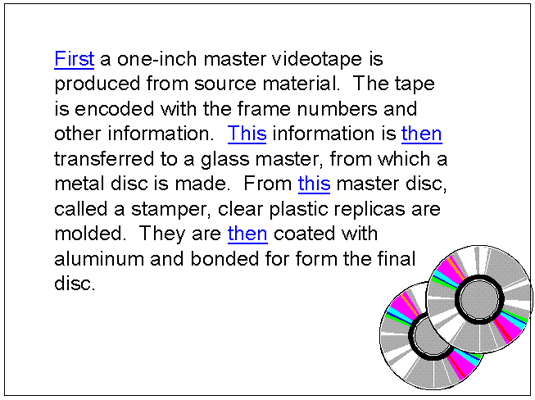
Another option is to have students edit sentences or paragraphs in Microsoft Word, apply the HEADING 1 style, then save the files over the network. You can then go into PowerPoint's Outline mode and select Insert-- Slides from Outline. You repeat this step for each student file and in a few minutes can have a slide presentation created from all the students' work.
Provide pictures and other graphics supporting the material. PowerPoint also allows you to present graphs, figures, scanned photos, and other supporting visual material. I have found the Web to be an especially rich source of materials to use.
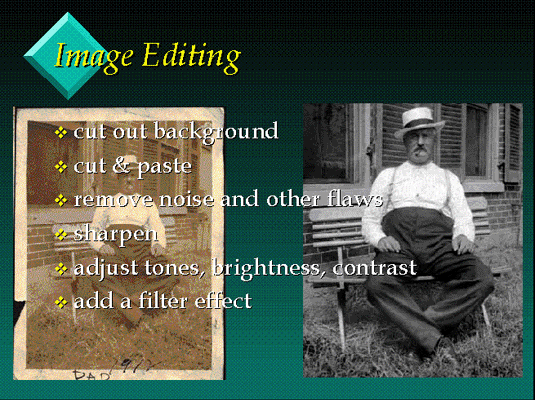
I simply right-click the picture in Microsoft Internet Explorer, then save it as a JPEG or GIF file to my hard drive. PowerPoint easily brings in these file formats; just select Insert-Picture. In fact, I now convert all my graphics to JPEG or GIF to make the file sizes smaller. You can use an image editing or graphics program to modify the number of colors and resolution to be the smallest file size possible. You can also cut and paste text or images into PowerPoint.
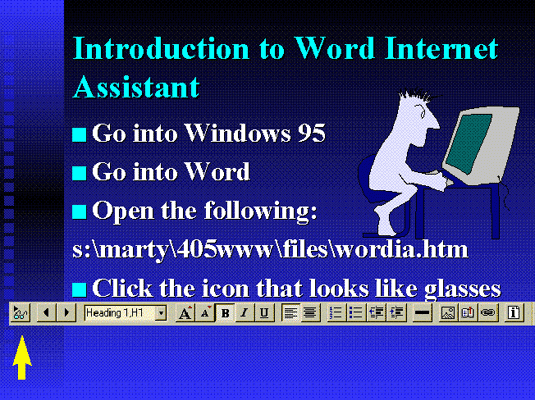
I also use many screen captures from software programs. These graphics allow me to explain menu or dialog box options in a software package I am teaching. I have also used screen captures to show sample Web pages, online help screens, and document design.
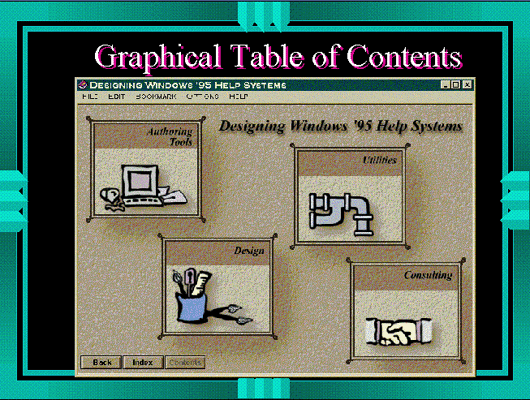
When I need to show an actual document, I have students call up the PowerPoint presentation and view it on their own monitors. This technique allows them to see text that will not project well. Also, I ask them questions about the samples; they provide answers on a worksheet and can work at their own pace.
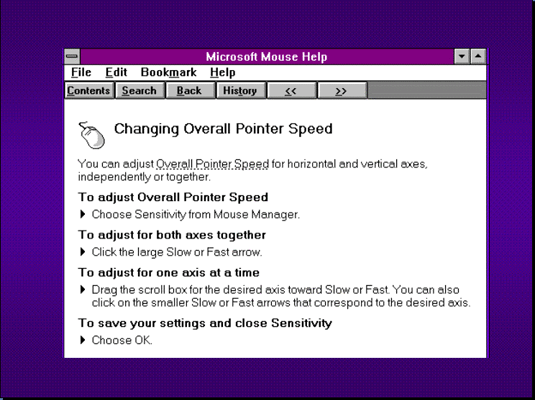
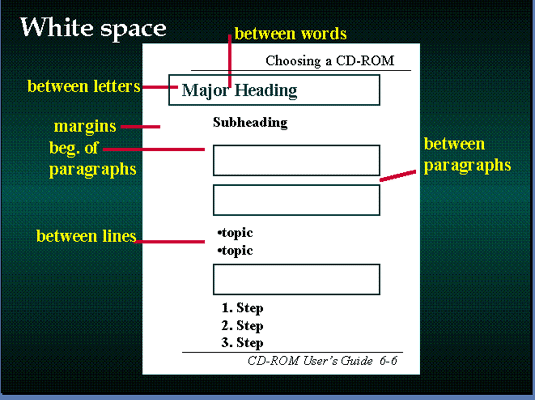
PowerPoint's drawing tools allow me to quickly create diagrams. For example, I can show simple page layouts by using boxes, bullets and lines to represent text. The new flowcharting feature is also useful and easy to use. It can be used, for example, to show writing steps, document flow or organization.
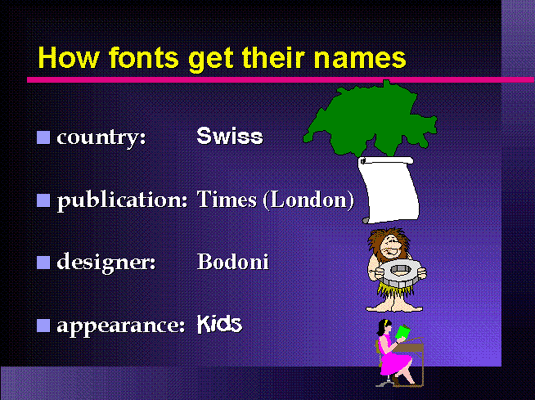
Stimulate interest by use of clipart and cartoons. Clipart and cartoons can add visual interest and humor to the presentation. PowerPoint 97 has a large clipart collection available on CD-ROM, and the AutoClip art feature is useful for suggesting appropriate graphics based on keywords in your presentation. I also make custom templates for special days such as Halloween and Valentine's day.
Display assignment information. Slides can provide reminders of due dates and requirements and can provide examples. You can also emphasize upcoming assignments, remind students of due dates, outline key features they should remember, and provide examples of what you expect.
Make important announcements. I have found PowerPoint especially useful for making announcements or getting students immediately to work. Slide presentations have the advantage of being updated on the spot, an invaluable feature in a lab situation where it is necessary to make last minute announcements about hardware problems, lab procedures, or locations of files on the network. Slides can also tell students what page numbers to turn to, and can inform students what they should be working on. For example, a slide outlining activities to be done can be projected continuously at the beginning of a lab. This technique allows students to get to work immediately and stragglers to become quickly informed as to what is happening.
Student Assessment of PowerPoint Presentations
At the end of each quarter for one year, I asked students to rate the extent to which the various uses of the slide presentations helped them in class. The following summarizes their comments.
They rated announcement slides most highly; 96% believed this information was highly or very highly useful. Next, 92% rated supplementary graphics about the material as highly or very highly useful. Students considered notes and bullet points about key points important; 86% rated them highly or very highly useful. Finally, 80% of students believed the slides summarizing assignment information and the use of clipart and cartoons highly or very highly useful. The highest neutral response (13%) was the value of clipart and cartoons. However, there were essentially no negative responses about any of the types of slides. Only one student did not find the graphics or clipart useful.
When asked the reasons why computer presentations helped them in class, students stated that they were useful for the following reasons:
- clarified information
- highlighted major points for emphasis
- helped students visualize concepts. (Students who called themselves visual learners especially emphasized this benefit.)
- helped students understand and remember the material better
- summarized and organized material
- provided examples with greater legibility than overheads
- made material more clear, colorful, and interesting
- helped students stay focused on the material and follow along more easily
- outlined goals and tasks for the day
- helped students understand exactly what was expected of them
When asked to suggest ways to improve the slide presentations, the predominant reminder was to go over the slides more slowly. Otherwise, students had no negative comments.
Advantages to the Instructor
Slide presentations also have benefits to the instructor, and the new features in PowerPoint 97 make creating lectures even easier.
Organization. The necessity to create slides makes you rethink the material and organize it better. New features such as "expand slide" and "summary slide" remind you to break up long bullet lists and stop to summarize your points.
Flexibility. You have flexibility in creating your lectures and the methods for output. For example, let's say you teach a morning and afternoon class with different student levels but with some common material. You can rearrange slides and create custom slide shows for these classes. If you have typed your class notes in a word processor you can even bring them right into PowerPoint. You can also easily print out thumbnails or outlines and have print materials for yourself and students. Your slide presentations can also be output to videotape, made available over a network for student viewing, or put on the Internet. If you save your PowerPoint slides in html format, any student with a browser can view your materials. You can also create interactive tutorials or self-running presentations for students to view outside class.
Classroom presentations are now even more flexible. For example the "hide slide" feature allows you to put background, explanatory notes, examples, or other materials on hidden slides. You can then opt to show these slides when a student asks a question. The "meeting notes" feature is useful if you want a more interactive lecture and would like to take notes of comments students make.
Storage. It is easier to store your presentations on computer than in file drawers full of overhead transparencies. You can use PowerPoint's "Pack and Go" feature and PowerPoint Viewer to carry only a floppy disk with you or distribute to people without PowerPoint.
Equipment Needed
To use slide presentations in class, you will need a laptop computer or a workstation that is permanently available or can be rolled or carried into the classroom. This computer should have a fairly large hard drive if you have a number of scanned images or graphics. However, you can use recordable CD, JAZ or ZIP drives, or other storage media. Ideally, your computer should have a 486 or Pentium processor and more than 16 MB of RAM. If you want to enhance your presentation with multimedia or use CD ROM resources in class, you will need a sound card, speakers appropriate for the audience size, and an internal or external CD ROM drive. You will also need one of the following to project your computer screen:
- an LCD panel/overhead combination or an LCD projector;
- a CRT or light valve projector for larger rooms;
- a large computer monitor for smaller lecture rooms; or
- a scanner to obtain materials from books and other sources.
Issues To Be Aware Of
If you plan on using slide presentations in class, there are some issues you should be aware of. You will need more time before and after class to set up, troubleshoot, and turn off your equipment. Be flexible. Sometimes there will be an inevitable hardware or software problem. Bring backup disks, overheads, or be ready to lecture without your presentation materials.
If you use graphics in your presentation, remember that it takes time to draw your own graphics and to scan images from resource materials. Students may help you obtain these resources. In addition, your files may become extremely large and your presentation may run slowly and even crash. Use graphics or image-editing programs to export your graphics with fewer colors (16 or 256) and resolution slightly greater than or equal to that at which you will display it. I have found JASC PaintShop Pro especially useful for working with graphics and for obtaining screen captures. When possible, choose simple images. Images with fine lines and detail do not project well. In addition, break up extremely large images into smaller segments. In other words, don't expect to project an 8 by 11-inch flow chart or organizational diagram.
Tips for Using Slides Effectively
Screen Design. PowerPoint comes with numerous templates that are artistically designed and use large, legible fonts. Some of the color schemes may look good on 35mm slides but will not look good projected in a semi-lit classroom. Use clear, large, legible fonts for text. This is especially important if you have scanned text or have cut/pasted text from a word processor. However, if you use a workstation different from the one you will be presenting on, be sure that you select a font available on the presentation computer. The Pack and Go Wizard in PowerPoint 97 packages together, on a disk, all the files and fonts used in the presentation. Also be sure to use good color contrast, especially if you are projecting in a room where there is ambient light. I have found that a very dark background with white text or very light background with black text works best. A few workshops or one-on-one sessions with an instructional designer are highly beneficial if they are available.
Do not put too much information on the screen, only your key points. Fill in the details yourself and provide information on the handouts so students don't have to frantically take notes. However, give students a reason to come to class; avoid giving them everything in a handout. Most important, avoid "bullet-itis." Many faculty who begin using electronic slide shows tend to rely too heavily on bulleted lists. Students then complain about too many lists or slides crammed with text. So keep slides simple and minimize the amount of information on each slide. When possible, use graphics to present the same information. For example, instead of listing four types of software, use graphics of four floppy disks with the name of the software inside each. Also, avoid using too many slides. Keep the slide presentations about 10-15 minutes long and then stop for some interaction or an activity. If timing is an issue, PowerPoint's new Rehearsal feature lets you time your presentation.
Uses. Use slides selectively to support your main points, to provide examples and graphics, and to make announcements and reminders. Try to break up the monotony of text by using pictures, maps, diagrams, and other visuals. If possible, add sound and other multimedia elements; use animation such as flying text and fancy transitions in moderation. PowerPoint 97 has great support for these multimedia elements. Again, be sure to supplement your slides with thumbnails or other handouts so students are not overwhelmed with information.
Methodology. Electronic presentations tend to make you lecture more quickly than usual, so remember to move slowly from slide to slide. To maintain suspense, you can use the feature of hiding bullets until you are ready. Use traditional lecturing techniques to elaborate on key points. Most important, don't lose your normal teaching style. Students who have faculty who teach both with and without a computer note the difference in their lecture styles. They also note that faculty tend to stay tied to the computer. A remote control device will allow you to move more freely around the room. Be sure to practice using the equipment in advance because students quickly grow impatient during hardware and software glitches and feel their time is wasted.
Projection. Use the best projection equipment you can afford and periodically check the resolution and contrast. Schedule slide presentations in rooms where lighting levels can be adjusted. Use a larger image and/or screen for larger classes or else try using several large monitors.
Conclusions
Slide presentations are a highly effective method of enhancing classroom presentations and aiding student productivity in laboratory settings. Student response has been overwhelmingly positive; they believe electronic presentations help clarify, visualize, emphasize, organize, and summarize information. In fact, many students believe that the slide shows are one of the biggest positives of the course. A survey I conducted of students in other Liberal Arts classes found that students appreciate efforts faculty make to keep up with technology. It is especially important in technology courses for faculty to use the technology themselves. Microsoft PowerPoint is easy to use and learn, providing Wizards to guide you through the creation process. It also provides a wide array of tools for using graphics and multimedia, for presenting your lecture, and for various other output options.
Remember that you will need sufficient time to learn to set up and use the equipment, convert your lecture materials, and obtain all the graphics you may want from various sources. You may also need time to adjust to a new way of lecturing. Keep in mind that the computer is a tool, not the primary focus of your class. But even a tool can greatly enhance your lecture style and impact student learning and productivity.
pc game downloadscard gamesmarble popper gamespuzzle gamesbrain teaser games

